
Tomorrow is Valentine’s Day and I’m getting prepared to have a special dinner and dessert for the loves in my life…my handsome, hard-working, funny, loving husband, and my two little rugrats 😉
My husband’s favorite cake ever is Funfetti…which makes me laugh. But oookkkk, so to show my love for him I’ll make Funfetti cake!
Let me be clear. This isn’t going to be your basic Funfetti cake…oh no, lots of love is going into this special creation! So let’s begin!
Gather your Funfetti ingredients:

- Funfetti cake mix
- Eggs
- Butter – melted (the box calls for oil, I substitute same amount of butter for the oil)
Now let’s bake them a cake as fast as we can!
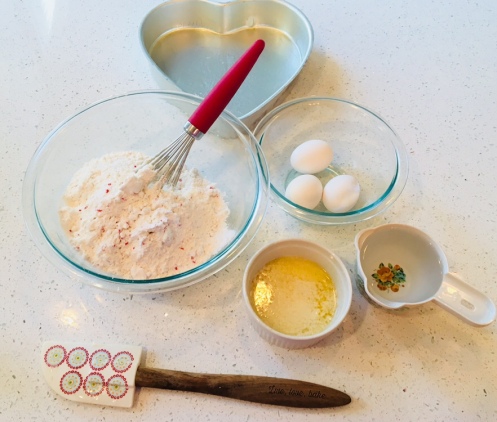
Usually I will use my stand mixer, but I decided to do this the “old-fashioned way” and just use a whisk.
I’m making two boxes to make an extra tall layered cake. I have 2 heart shaped pans that I’ve greased up, and I’ve already preheated the oven to 350 degrees. I’ll mix up each box separately and pour each batch into one of the pans.
Mix all the ingredients together in a bowl. Whisk for about 2 minutes. Use those arm muscles! Then pour into the pans. Tap the pans on the countertop a couple of times to release any air bubbles.

Put in the preheated oven and bake for about 30 minutes. I do the ‘jiggle’ test, taking an oven mitt and gently jiggling the pan to see if the center is still liquidy. I’ll also do the toothpick test to check for doneness. If it’s done the toothpick will come out clean when inserted into the center of the cake.
They’re getting there!

Once done, remove from oven and let cool in the pans on a cooling rack for about 10 minutes.

Then remove from pans and let cool completely on cooling racks.

I want to have a nice, level cake. To do this the cakes need to be perfectly flat so we need to trim them up a little bit. To do this I use a Wilton cake leveler that I’ve had since I started making cakes….oh….about 12 years ago! Wow, I’m getting old….
First, trim off the top…


Carefully remove the cake that you’ve cut off the top. These scraps are great for ‘taste testing!’
Then, I use the same tool to cut the cake in half.

Now you should have two equally level cake layers.

Repeat these trimming steps for the other layer…after that you should have 4 equal layers of cake!
Now comes the frosting. I’m going to make a light pink buttercream frosting. Frosting is easy to make, the only thing I dislike about making it is that the powdered sugar really makes a mess. I need to invest in a shield for my stand mixer to reduce the messiness!
I use a very basic recipe, you can find it here.
Now, I ended up tripling this recipe for this cake because I knew it would take a lot of frosting. I used pink food coloring and added it in just a drop at a time while mixing the icing until it became just the perfect shade of light pink.

See how the powdered sugar “exploded” out of the mixer 🙂
Now that we have the frosting made…I put together a Wilton piping bag to put the frosting in. Here are a few pictures of the steps:
Gather a piping bag, scissors, a coupler, and a tip…

Now cut the tip off of the bag…cut about an inch off.
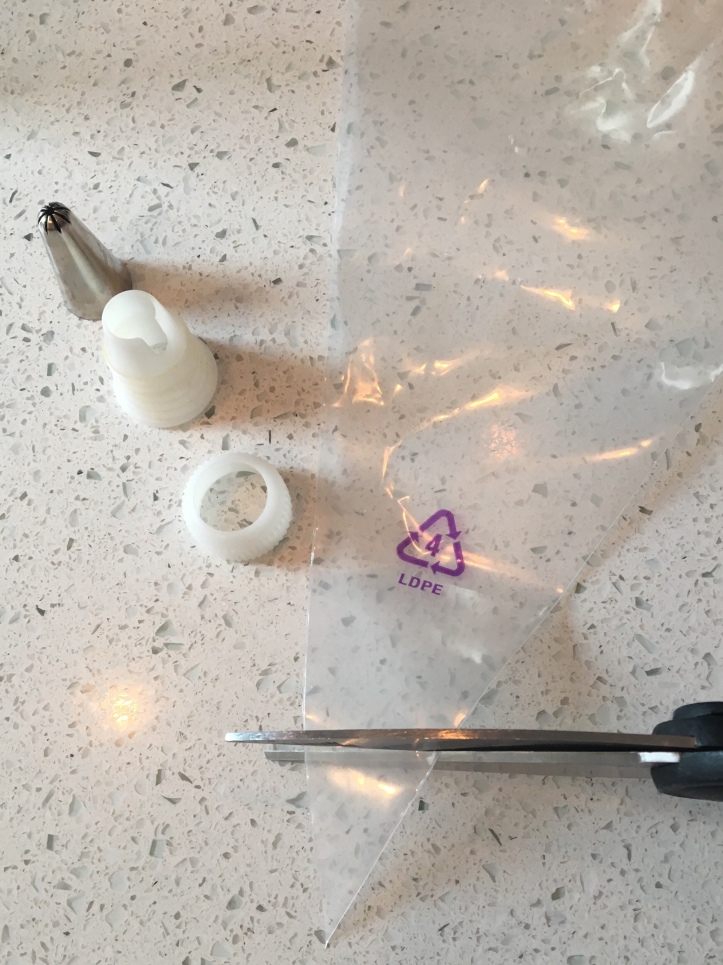
Put the inside piece of the coupler inside of the piping bag.

Next put on the tip of your choice and screw on the outside piece of the coupler.

I get a tall glass and put the piping bag into it so that it’s easier to fill.


Now comes the fun part…icing and decorating the cake!
I start by placing the bottom layer on a cake stand. Then I pipe a border around the edge of the bottom layer that acts as a ‘wall’ to hold in all the frosting whenever the next layer is placed on top of it.
(I don’t use a tip with the piping bag for this process.)


Place the next layer on top….


Repeat this process for the next two cake layers…when done you will have 4 layers of cake with icing between each layer.

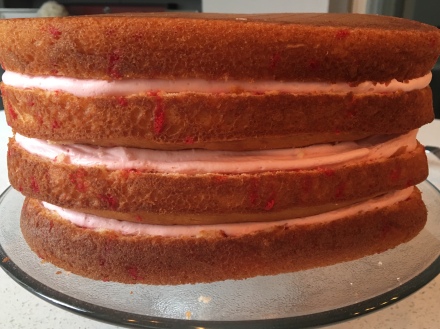
Look at that height! It’s going to make for an impressive looking cake!
Now we need to ice the outside of the cake. I just start lathering the icing on the cake…

At this point it’s not very smooth. So, what I do is get my offset spatula and a warm glass of water. I dip the spatula in the water and begin smoothing the icing. It’s amazing how this trick makes the smoothing process so much easier.


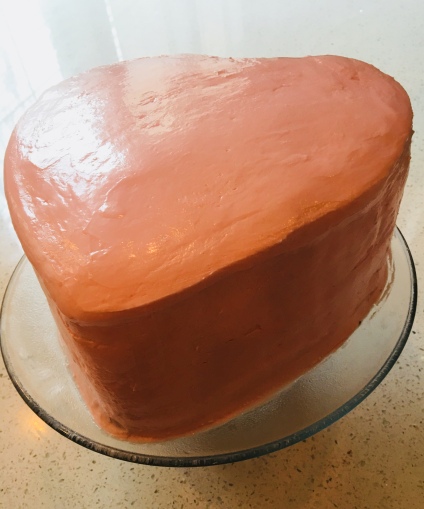
Now that the cake is as smooth as I can get it, I will start decorating the cake! Yay!
I use a #35 Wilton tip to do all the decorating of this cake. Super easy!
I begin by making little ‘rosettes’ all around the outer edge of the top of the cake.


How cute is that!
Next I use the same #35 tip and make a shell border around the bottom…

I have some Valentine’s sprinkles that I’m going to sprinkle on top…


And Viola! That’s it! This is such a fun and festive cake inside and out! I can’t wait to dig into it tomorrow night for our Valentine’s Day celebration dinner! I know it’s going to taste as good as it looks!
Did you make these?

Tag @sweetestthingsbyjen on Instagram and hashtag it #sweetestthingsbyjen

